
If you’re opening Outlook or Outlook for Microsoft 365 for the first time, you might encounter the “Choose Profile” window. You can enter ‘Outlook’ as your profile name and click OK to continue. Then, click Next on the “Welcome to Outlook” window. This step is your gateway to adding your email accounts to Outlook.
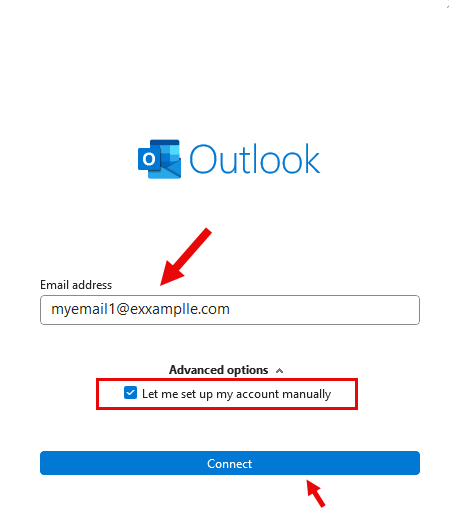
- In Outlook, select File > Add Account. If it’s your first account setup, try using the ‘Connect’ option with your email ID and password for an automatic setup. If auto setup does not work, select “Manual setup or additional server types”.

- Choose “Manual setup or additional server types” and click Next.
- Select “POP or IMAP” and proceed by clicking Next.

- IMAP is recommended over POP3 for its ability to synchronize emails across all devices, reflecting any actions (read/delete/reply) both on the server and your mail application.
- Fill in the required fields using the information obtained from cPanel:
- Your Name: The name that will appear in your outgoing emails.
- Email Address: Your full email address.
- Account Type: IMAP (recommended) or POP3.
- Incoming Mail Server: (IMAP information from cPanel)
- Outgoing Mail Server (SMTP): (SMTP information from cPanel)
- Username: Your full email address.
- Password: Your email account password.
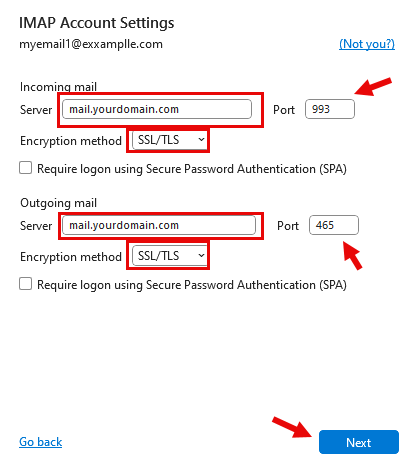
Info! Recommended Secure SSL/TLS Settings:
- Username: username@yourdomain.com
- Password: Use the email account’s password
- Incoming Server: yourdomain.com
- IMAP Port: 993 – POP3 Port: 995
- Outgoing Server: yourdomain.com
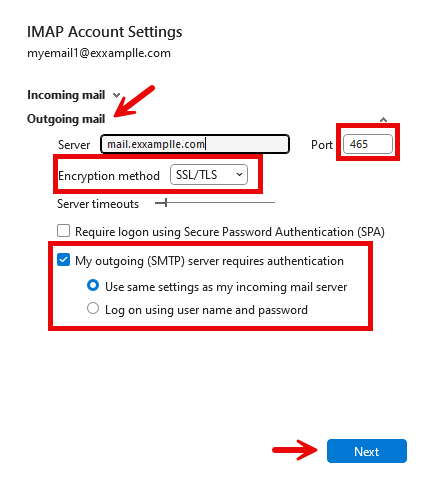
- SMTP Port: 465
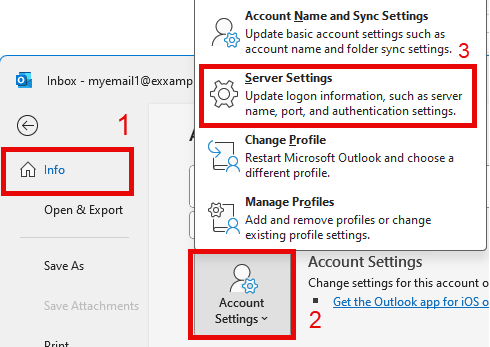
- Click on More Settings > Outgoing Server tab and check “My outgoing server (SMTP) requires authentication.”
- Go to the Advanced tab. Enter the IMAP and SMTP port numbers you noted earlier. Select the correct encryption method (SSL/TLS or STARTTLS, as recommended in cPanel).
Click OK > Next. Outlook will now test your settings. If everything is correct, you’ll see a success message.